The Notes application enables Note Categories to be set up. Note Categories allow different types of note text to be created and attached to bookings and services at various levels. Notes, by category, can be incorporated into agent and supplier messages. There is no limit to the number of Note Categories as multiple note categories can be created per type.
A Note Category type determines where the note text can be inserted
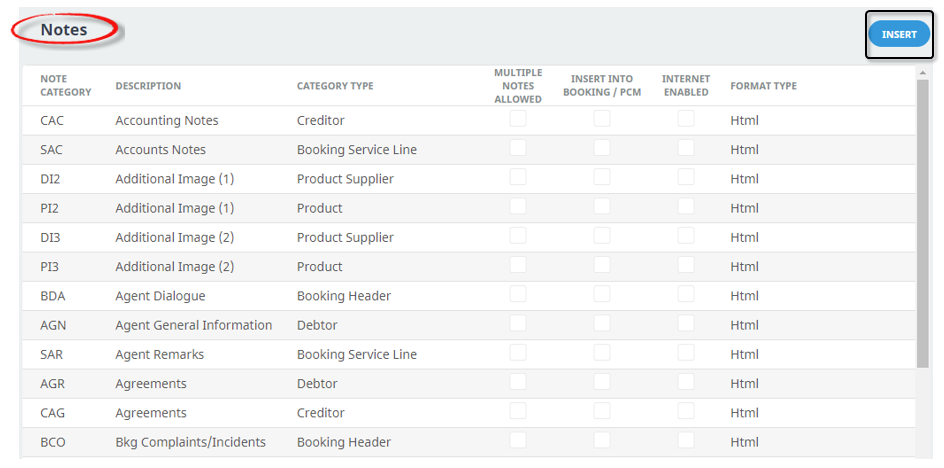
Available note category types are:
|
Note Category Type |
Used For |
|---|---|
|
Booking Header |
Booking Header notes can be created at booking header level—i.e., they apply to the booking as opposed to applying to a specific service in a booking which is a booking service line note. |
|
Booking Itinerary |
Booking Itinerary notes can be created at booking header level, similar to booking header notes, but they apply to an individual Group Book itinerary. |
|
Booking Service Line |
Booking Service Line notes can be created at an individual service level in a booking—i.e., they apply to the service as opposed to applying to the overall booking (Booking Header Note). |
|
Creditor |
Creditor notes are created against the Creditor (Supplier) and can be viewed or edited in the creditors application or from the product supplier application. |
|
Debtor |
Debtor notes are created against the Debtor (Agent) and can be viewed or edited in the Debtors application. They are also able to be viewed in bookings. |
|
PCM Header |
PCM Header notes can be created at PCM header level—i.e., they apply to the PCM as opposed to applying to a specific service in a PCM (PCM service line note). |
|
PCM Service Line |
PCM Service Line notes can be created at an individual service level in a PCM—i.e., they apply to the service as opposed to applying to the overall PCM (PCM header note). |
|
Product |
Product Notes are able to be created and edited in the product and viewed in product and bookings. |
|
Product Supplier |
Supplier Notes are able to be created and viewed in the product database and suppliers and can be viewed in products, suppliers and bookings. Notes created in this category apply to all services in the product database that has the supplier attached. |
There is no limit to the number of codes that can be set up under each category, but as with most coding in Tourplan NX, some thought should be put into the definitions of note categories, otherwise later maintenance can become a burden - i.e., it may be easier to have a product supplier note covering most aspects of all services that the supplier provides, rather than having product notes set up which, if applying to specific services, would need editing in every service if the note detail had to be changed.
Create Note Categories
-
From the Home menu, select
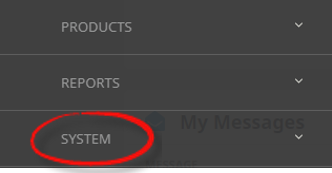
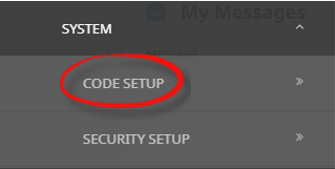
 Home > System > Code Setup.
- Click the Home menu to expand it:

- Click the System menu option to expand it:

- Click Code Setup to go to the Code Setup menu:

- Click the Home menu to expand it:
-
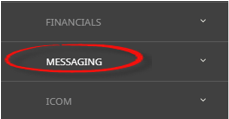
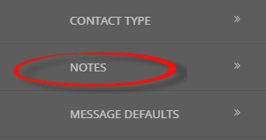
From the Code Setup menu, selectMessaging > Notes.
- Click the Code Setup menu to expand it:

- Click Messaging to expand the Messaging menu:

- Click Notes to open the Notes screen:

- Click the Code Setup menu to expand it:
-
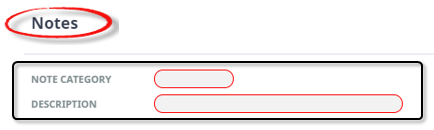
On theNotes screen, if the Note Category that you want is not already in the list, click Insert.
-
On the blankNotes screen, enter a Note Category and Description.
-
Keeping with theNotes screen, select the Category Type and Format Type, and select if Multiple Notes are Allowed, if the note can be Inserted into a Booking/PCM or if the note is to be Internet Enabled.
- Review the completed screen.
-
ClickSave to keep the changes.

-
ClickExit to discard any changes.


NOTE: After clicking Save, the screen clears, ready for another Note Category - continue adding Note Categories or click Exit to close the screen.
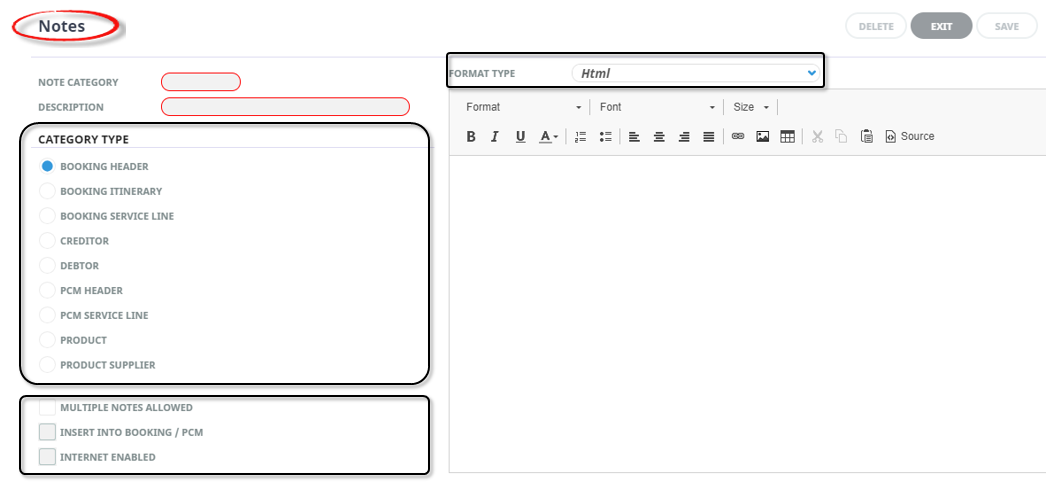
About Note Fields
![]()
Note Category (Chr 3)
A 3 character field used for the Note Category code.
Description (Chr 30)
A descriptive field to describe the Note Category, this field can be up to 30 characters.
Category Type (Radio Button)
Only one category type can be selected per Note Category, a full list and description of available note category types is in the table above the procedure to create note categories.
Multiple Notes Allowed (Check-box)
Note categories that have this box checked can have multiple notes created—for example new pages are added to the note each time the note is edited. When the check box is unchecked, any additional notes are appended to the same page as the original.
NOTE: When note categories that allow multiples are to be included in message output, it is not possible to control which page is to be output. Where multiple copies do exist, the last entered/edited note will be output.
Insert Into Booking /PCM (Check-box)
When this check box is selected, any notes attached to a PCM will be copied into the booking when a PCM is inserted or a package PCM is copied into a booking.
Internet Enabled (Check-box)
When this check box is selected, notes attached to suppliers, product and product supplier notes are available to be viewed via the Tourplan webConnect Internet booking system (this check box applies to creditor, product, product/supplier note category selections).
Format Type (Drop-down)
Two types of text format are available:
- Html - will generate the note including all paragraph and font formatting including bold, italic, underline etc. as well as the importing/pasting of images.
- Plain Text - will generate the note in plain text, stripping any formatting.
Notes and Language Translations
Information saved within notes cannot use the language translation table to translate text. If notes are used as part of the messaging setup for generating text onto your messages, an added Note Category must be used for each language. This provides users with the ability to save note information with (already) translated text within the dedicated note field.
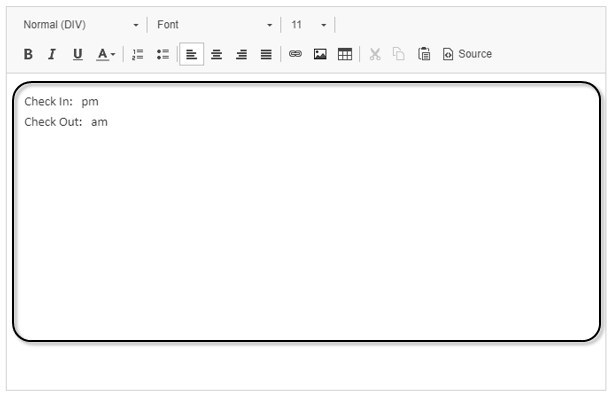
Setting the Note as a Template
The note can be made into a template by adding text to the free text format field. A note template will then appear within the note for consistent entry of data.
In this example, the text (Check In: pm Check Out: am) has been inserted into the free text format; when this note category is selected to insert the check in and check out times within the product or product/supplier note, this text will display for users to insert the times. Allowing for consistent formatting of the notes field.
About Template Note Fields
The free text format field is a blank page for the note template information text to be inserted.
The Editing screen has the following items:

| Format type | Format Option Descriptions |
|---|---|
| Format | Format of the text |
| Font | Font of text (will default from Tourplan INI Setting DEFAULTFONT) |
| Size | Font Size of text (will default from Tourplan INI Setting DEFAULTFONTSIZE) |
| Style, Font and Font Size. The available styles and fonts are defaulted from the INI settings noted above. Supported fonts are included in the System Setup User Manual - INI Settings DEFAULTFONT | |
|
|
Bold - highlight the text to be bold faced and click this button |
|
|
Italics - highlight the text to be italic and click this button |
|
|
Underline - highlight the text to underlined and click this button |
|
|
Colour of text – highlight the text to change the colour and click this button |
|
|
Numbered bullet points - click this button to create a numbered list |
|
|
Bullet points - click this button to create a bulleted list |
|
|
Left aligned text - click this button to justify text on the left margin |
|
|
Centre aligned text - click this button to centre text between the left and right margins |
|
|
Right aligned text - click this button to justify text on the right margin |
|
|
Insert a URL link – click this button to insert the text you want showing as a hyperlink and insert the required URL
|
|
|
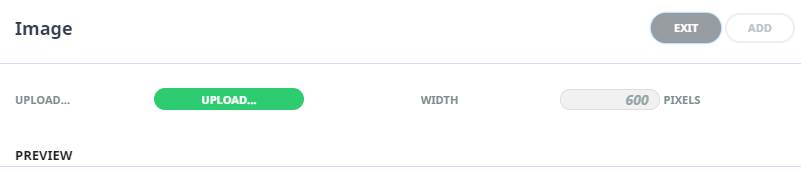
Upload an image – click this button to upload an image.
|
|
|
Insert a table – click this button to insert a table |
|
|
Cut text (Ctrl+X), highlight text to be cut and click this button |
|
|
Copy text (Ctrl+C), highlight the text to be copied and click this button |
|
|
Paste text (Ctrl+V), place the cursor at the point where copied/cut text is to be placed and click this button |
|
|
Selecting this button will show the text editor in CSS styling source code |